Shop
Shop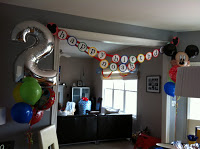
party day
the inspiration for this banner came from a similar banner i saw on etsy, but since i like to think i’m slightly crafty, i of course had the thought “i can do that.” not only that, but i wanted to make this banner. i wanted it to be a special piece of our son’s party that was unique and different and unlike anything i could go into a store and buy.
with that, i first hit up michael’s for some necessary paper crafting supplies. knowing we were going with a bright, rainbow color palette, i wanted every color incorporated into this banner. so i stocked up on some heavy scrapbook stock (purchased in a rainbow colors value pack – it was more of a value than purchasing individual sheets), and white and black cardstock as well (white for the second layer circles, black for the letters). i held off on selecting a pattern for the end cap icons, and also for the ribbon which would hold this banner, until i could make sure i took some measurements and also had all of my basic shapes for my banner cut out and available to mock up. with my stock of scrapbook paper, i started on phase i of the banner project – sizing and cutting.
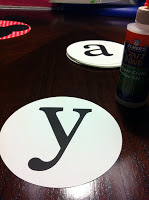
to start, i needed to cut my main rainbow color circles for each letter of the banner – and figure out what dimension i wanted on the circles. once again, my trusty cricut was a huge help for the circles, using my plantin schoolbook cartridge. after some trial and error, i settled on 6-1/2″ for my main letter circles, 5-1/2″ for my white second layer circles and 8″ for my end cap circles.
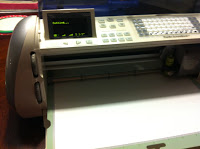 the cricut
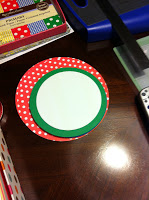
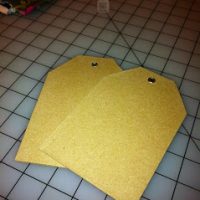
end cap, color and white circles
after cutting the color and white circles (17 of each), it was time to start cutting out the letters. i’m personally a huge fan of lowercase letters – once again, trusty cricut to the rescue. all letters were cut from the plantin schoolbook cartridge. for these, i went with a size of 5″ tall, cut out of simple black scrapbook paper.
 all circles and letters were cut. as a tip, i purposely didn’t adhere anything together because i needed to figure out how in the world all of my circles were going to hang perfectly and evenly – and on what size of ribbon i would use. (this is where the engineering part came in. thanks to my dad for passing on the desire to figure out how things like this might work!) once again, headed to michaels. i knew i wanted a thick, grosgrain ribbon – i found a perfect 2-1/2″ wide ribbon, in bright red with a tiny white stitch detail in it. two spools of ribbon (for a total of 36 feet) and one exacto knife later and we had a perfect pattern and a way to hang our circles…by cutting two slits in each color circle (each about 2-1/2″ high, and directly parallel to each other) and weaving the ribbon through each circle. the slits were just the perfect size, so the circles wouldn’t slide and spacing stayed the same. (a great hint: i actually make a pattern with the slits in an extra circle i had – super easy way to make sure all of the circles had the same size slits in the same location.)
circle strung through ribbon
then, i strung all of the color circles on the red ribbon to get the spacing just right (another hint: if you can, once the circles are strung, try and hold up your banner in the spot it will actually hang. this was a huge help to make sure the spacing of all of the letters would be just right.)
next, it was time to start gluing. i used an elmer’s craft glue (specific for paper). since hindsight is always 20/20, i would have gone with spray mount…but with the pesky fumes and the residual stickiness and the lack of a great spray mount hood (like i’m fortunate enough to have working in the agency world), i went with the glue option. this did make some of the paper crinkle some, but with the help of some of mike’s giant textbooks from college, the wrinkles (mostly) went away.

repurposing mike’s grad school textbooks
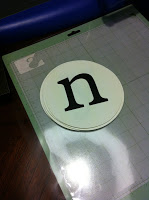
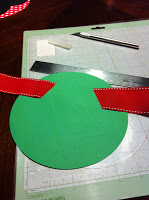
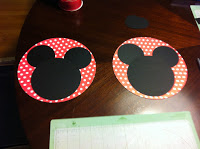
while the letters were setting, i went about putting together the end caps…which had to include mickey mouse. i went with a cheery red and white dot pattern (cut at 8″ wide), and then went about trying to cut black circles to make my mickey heads. there was a bit of trial and error, but we finally got it right. these were then threaded on to the ends of the ribbon just like we did with the letter circles.
 since our hanging space for the banner wouldn’t allow for us to have the entire banner in one row, i did a second row to feature noah’s name. again, i highly recommend testing out how this second row will hang (and how much room you can allow it to hang below your top row…we didn’t want to have guests hitting their heads or ducking).
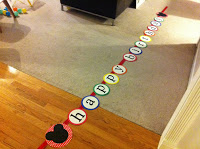
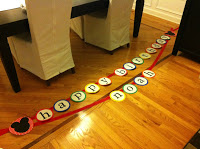 the banner turned out to be a huge hit and one that was kept up days after the party. (what can i say? we still wanted to celebrate.)
this has been one of my favorite projects so far. one for the reason behind it: celebrating my little boy’s birthday; and, two for figuring this one out a little as i went along. but most importantly, our little guy had a great mickey mouse birthday and one we won’t forget!